How to Convert Handwritten Notes to Digital Text Using OCR
A hands-on tutorial that walks you through converting handwritten notes, forms, and letters into searchable digital text — from scanning your document to exporting the final result. No cloud upload required; everything runs locally on your PC.
What You'll Learn in This Tutorial
- ✓ Why handwriting OCR is different from printed-text OCR
- ✓ Which types of handwritten content OCR can handle
- ✓ Step-by-step walkthrough: scan → OCR → review → export
- ✓ 7 practical tips to maximize recognition accuracy
- ✓ Real-world use cases and expected accuracy benchmarks
Part 1: Understanding Handwriting OCR
Standard OCR engines work by comparing pixel patterns against a library of character templates. This works well for consistent printed fonts — every "a" in Times New Roman looks the same. But handwriting is fundamentally different: every person's "a" is unique, the same person's "a" changes depending on pen pressure and writing speed, and in cursive script, characters are physically connected and overlap.
This means template-matching completely fails for handwritten text. Modern OCR engines address this with trained recognition models that learn patterns from millions of real handwriting samples rather than relying on predefined templates. PDF Agile's OCR engine includes a dedicated handwriting recognition mode that handles:
- Latin script cursive and printed handwriting in multiple languages
- Form fill-ins (handwriting mixed with printed form fields)
- Meeting notes and lecture notes in various writing styles
- Handwritten annotations on printed documents
What Types of Handwritten Content Can OCR Handle?
Cursive Connected Script — Traditional cursive where letters flow together without lifting the pen. This is the hardest form for any OCR system. Modern recognition engines handle it by analyzing word-level patterns rather than individual character boundaries. On clear cursive, accuracy typically reaches 85–92%.
Printed Hand-Lettering — Block capitals or separated printed handwriting. OCR achieves 92–97% accuracy on clear examples. Most student lecture notes, meeting notes, and address labels fall into this category.
Mixed Cursive/Print — Many people naturally switch between cursive and print mid-word or mid-sentence. PDF Agile's engine handles this by classifying each word region independently rather than assuming a consistent style throughout the document.
Handwriting on Printed Forms — The most common real-world case: a printed template (medical intake form, tax form, customs declaration) with handwritten fill-ins. PDF Agile's region classifier detects the form's printed text separately from the handwritten entries, routing each to the correct recognition engine.
Part 2: Step-by-Step Tutorial — Convert Handwritten Notes to Text
Scan or Photograph Your Handwritten Document
A flatbed scanner at 300 DPI gives the best results. A smartphone scan app (e.g., Microsoft Lens, Adobe Scan) is also acceptable — use the "document" mode, not the "photo" mode, to get deskewing and contrast correction applied automatically.
Tip: If your phone camera produces shadows or perspective distortion, use a scanning app to apply automatic correction before importing into PDF Agile.
Open PDF Agile and Launch the OCR Tool
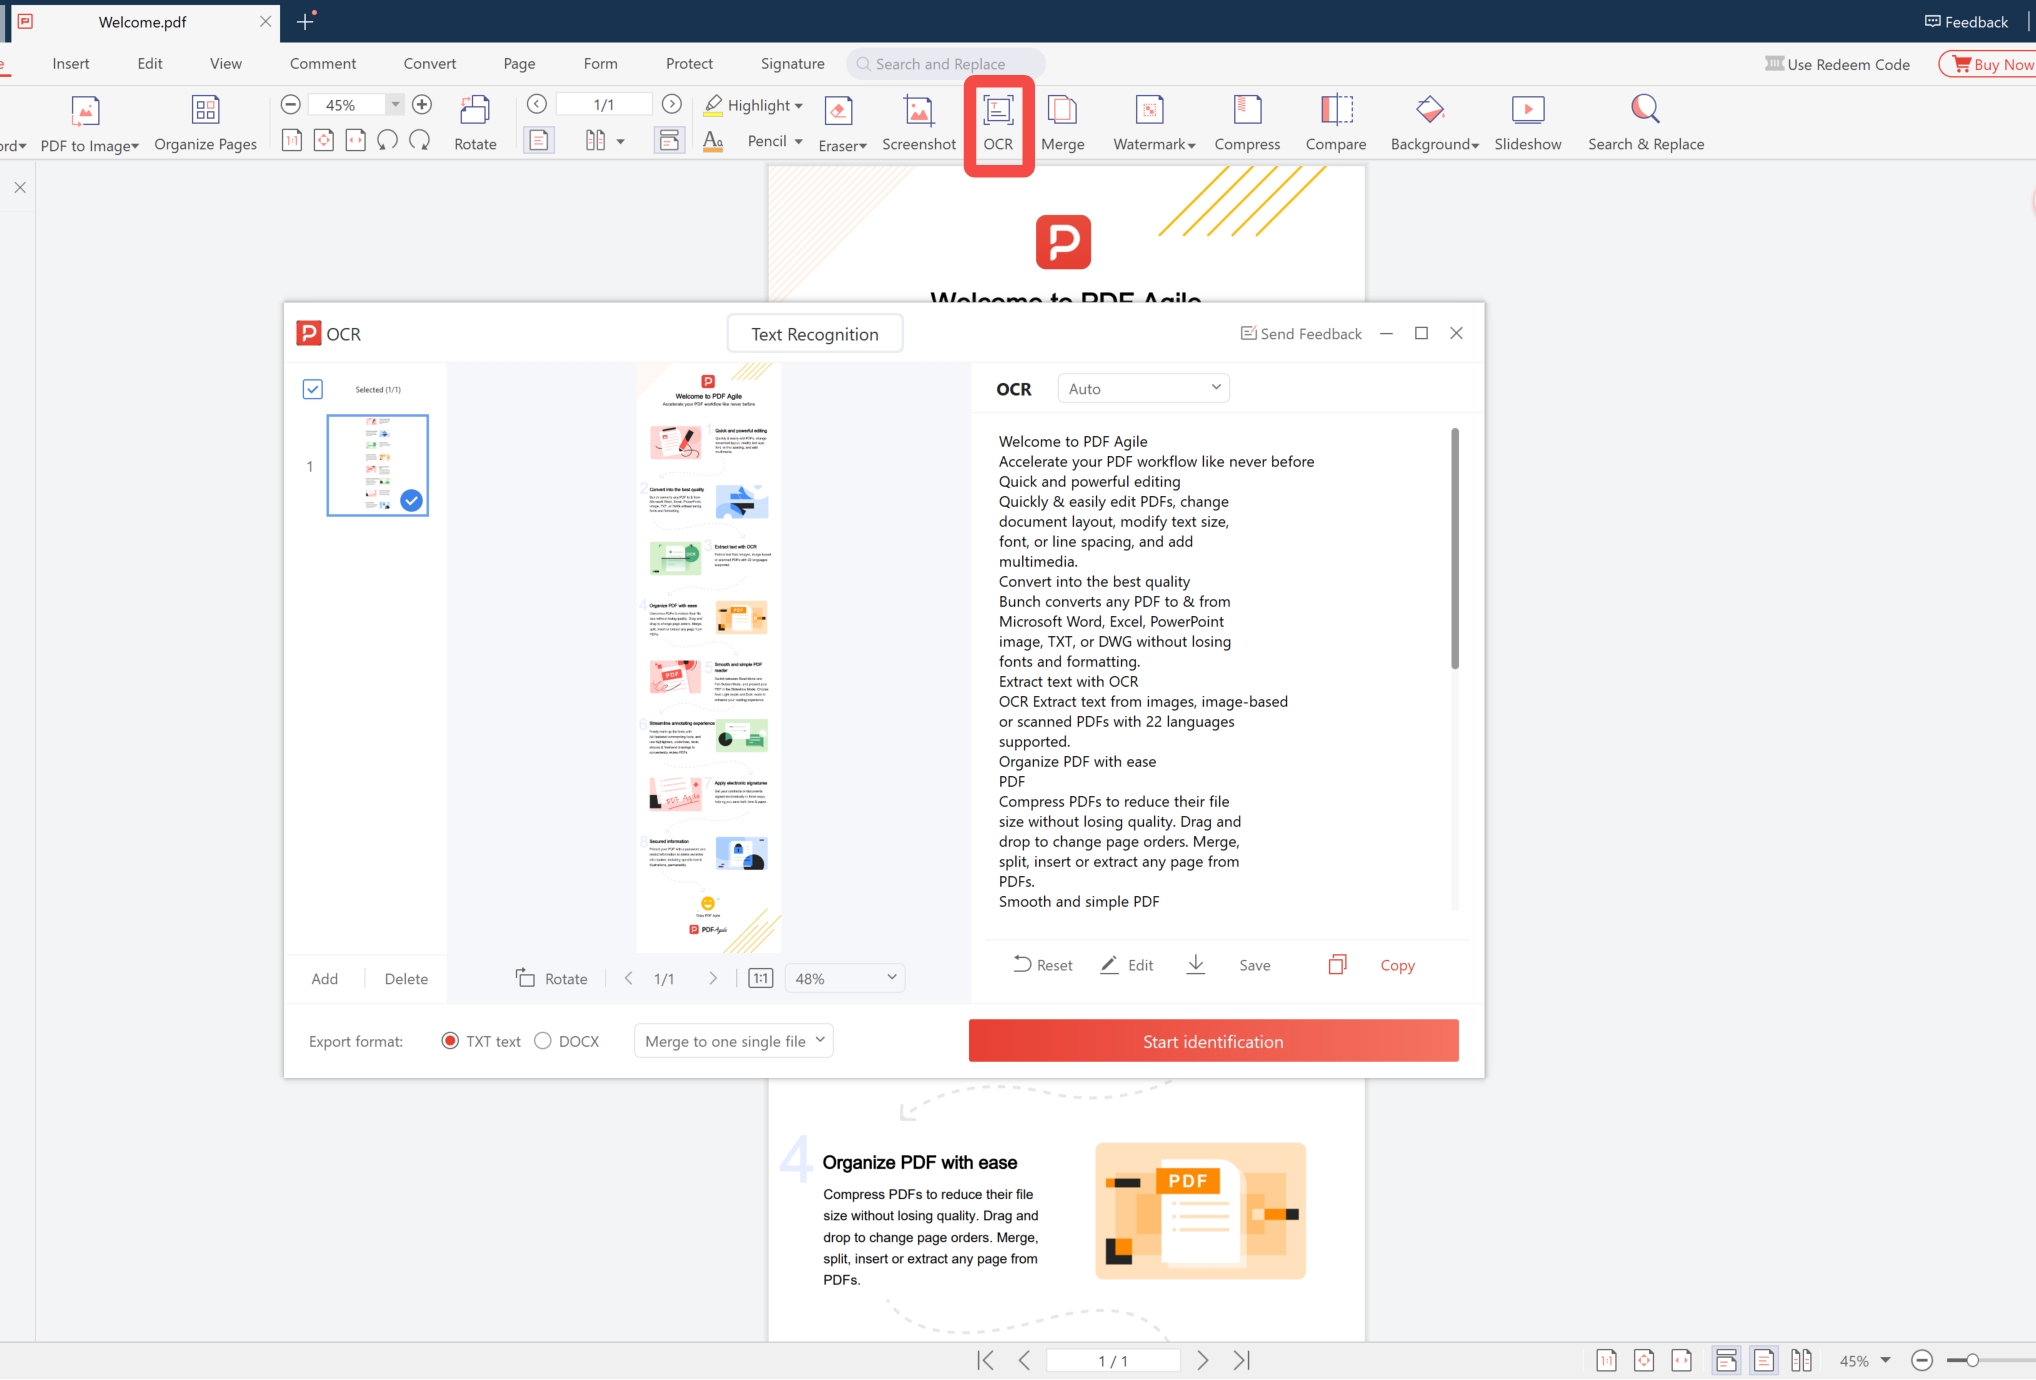
Launch PDF Agile on your Windows PC. Click the OCR icon in the toolbar (highlighted in the screenshot above) to open the Text Recognition panel. Drag your scanned image or PDF into the interface.
As shown in Figure 1, the OCR panel displays a thumbnail of your document on the left with a checkmark confirming page selection. The right side shows feature details and action buttons.
Select the Language of the Handwritten Content
Choose the language of the handwritten content from the language dropdown. PDF Agile supports 22 languages for OCR. If the document contains multiple languages, enable multi-language mode to recognize both simultaneously.
Choose Your Export Format
At the bottom of the OCR panel (see Figure 1), select your preferred output format:
- TXT text — plain text output, fastest to produce
- DOCX — editable Word document, preserves layout
- You can also toggle "Merge to one single file" for multi-page documents
Click "Start Identification" to Run OCR
Click the red "Start identification" button (visible in Figure 1). Processing runs locally on your device — no internet connection required, no data sent to any server. The engine analyzes your handwritten content and produces recognized text.
Review in the Built-in Editor
The recognized text appears side-by-side with the original scan. Low-confidence words are highlighted — click to correct them. Spend 2–3 minutes reviewing highlighted words before export; it's much faster than finding errors after the text is in Word.
Export Your Final Document
Once you've reviewed and corrected the recognized text, click Save or Copy to export. You can also choose to create a searchable PDF (which adds a text layer to your original scan, making it searchable in any PDF reader).
Part 3: 7 Tips to Maximize Handwriting OCR Accuracy
Scan at 300 DPI or Higher
This is the single most impactful setting. At 200 DPI, thin pen strokes (especially from ballpoint pens) may appear broken or disconnected in the digital image, causing recognition errors. At 300+ DPI, strokes are rendered continuously and the engine has enough pixel data to distinguish similar characters reliably.
Use a Flatbed Scanner When Possible
Camera photos of documents suffer from perspective distortion, shadow gradients from curved book pages, and uneven lighting. A flatbed scanner eliminates all of these. If using a phone camera, use a scanning app to apply automatic perspective correction.
Use High Contrast Ink
Black ink on white paper is optimal. Blue ink on white is also fine. Avoid: pencil on white (low contrast), any ink on colored paper, or highlighter-obscured text. If you have a low-contrast original, apply manual contrast enhancement before OCR (PDF Agile includes this as a preprocessing option).
Write on Lined Paper
Horizontal guide lines help the engine establish the text baseline. Unlined paper with significant slant requires the model to first estimate writing orientation before recognition — adding a potential source of error. Gridded paper (common for math notes) also works well.
Select the Correct Language
OCR models are language-specific. Running an English model on French text will produce errors on accented characters. For documents with text in multiple languages, select all relevant languages in multi-language mode.
Process One Page at a Time for Critical Documents
For high-stakes documents (legal correspondence, medical records), process each page individually and review before moving to the next. This isolates any problem pages and makes correction faster than reviewing a 50-page batch at the end.
Use the Review Editor Before Exporting
The built-in review editor highlights low-confidence recognitions. Spend 2–3 minutes reviewing these before export — it's much faster than finding errors after the text is in Word.
Part 4: Accuracy Benchmarks by Content Type
| Content Type | Expected Accuracy | Notes |
|---|---|---|
| Printed hand-lettering, clear, 300 DPI | 94–97% | Best case scenario |
| Mixed cursive/print, clear | 90–94% | Review recommended |
| Cursive connected script, clear | 85–92% | Use review editor |
| Filled-in forms (printed + handwriting) | 92–96% | Region classifier helps |
| Low-quality scan or photo | 70–85% | Preprocess first |
| Historical/archaic script | 65–80% | Manual review required |
Part 5: Real-World Use Cases
Students: Digitizing Lecture Notes
Convert handwritten lecture notes to searchable Word documents. You can then use Ctrl+F to find specific topics, import into note-taking apps, or share with classmates. For notes containing diagrams and tables, the OCR engine preserves the spatial layout in the output.
Professionals: Meeting Notes and Whiteboard Photos
Convert photos of whiteboard sketches and handwritten meeting notes into typed text that can be shared, edited, and indexed. Works even for casual "shorthand" notes — though accuracy is highest for clear, fully-formed letters.
Healthcare: Patient Form Digitization
Convert scanned patient intake forms, symptom descriptions, and handwritten clinical notes into searchable digital records. Because PDF Agile processes everything locally, patient data never leaves the clinic's network — critical for HIPAA compliance.
Legal: Handwritten Annotations on Contracts
Capture handwritten margin notes, corrections, and signatures on scanned contracts. The region classifier distinguishes between the printed contract text and handwritten annotations, processing each separately.
Frequently Asked Questions
Can OCR read difficult handwriting like medical prescriptions?
Medical prescription handwriting is notoriously difficult — even humans struggle with it. OCR handles it better than traditional template-matching engines but accuracy will be lower than for clear handwriting. Use the review editor to check recognized text against the original scan.
Does it work for left-handed writers?
Yes. The recognition engine was trained on diverse handwriting samples including left-handed writing styles. Left-handed writers sometimes produce a different pen angle and stroke direction — the engine handles this without any special configuration.
Can I OCR handwritten text in non-Latin scripts (Arabic, Chinese, etc.)?
PDF Agile's handwriting recognition currently focuses on Latin-script languages (English, French, German, Spanish, Italian, Portuguese, and several others). Non-Latin scripts (Arabic, Chinese, Japanese, Korean) are on the product roadmap. For printed non-Latin text, the standard OCR engine supports many additional scripts.
How do I handle a document with both handwriting and printed text?
Use Mixed Document mode (PDF Agile's default when auto-detection is enabled). The engine's classifier detects regions of printed text and routes them to the standard OCR engine, while handwritten regions go to the handwriting recognition engine. The output document combines both, preserving the original page structure.